The Battle of the Boyne
The Battle of the Boyne took place on 11 July 1690. It unfolded along the River Boyne near the town of Drogheda in eastern Ireland. The battle formed the central set piece of the Williamite War in Ireland and sat within the wider Nine Years’ War that pitted a European coalition against Louis XIV of France. In Ireland, the conflict was also a struggle over sovereignty, religion, and land. It pitted James II, a Catholic king deposed in the Glorious Revolution of 1688, against his son-in-law and rival, William III, the Protestant Prince of Orange, who had been invited to assume the English and Scottish crowns.
James had fled to France after the Glorious Revolution and found support at the court of Louis XIV. Ireland, where many of the Catholic elite viewed his restoration as a means to reverse earlier confiscations and secure religious toleration, became his most realistic base of operations. The Irish Parliament summoned by James in 1689 repealed many Cromwellian land settlements and promised broad relief to Catholics. William, determined to close a vulnerable front and deny Louis a foothold on Britain’s western flank, committed a large army and significant naval support to an Irish campaign. The stage was set for a showdown along one of the few river barriers between Ulster and Dublin.
Armies, Commanders, and Plans
William assembled a composite army of around thirty-five to thirty-eight thousand men. It was a coalition force that reflected his European position. Dutch guards and line infantry formed the professional core. English and Scottish regiments supplied numbers. Danish contingents served under treaty. French Huguenot exiles, veterans of Louis XIV’s armies who had fled after the revocation of the Edict of Nantes, fought with determination under commanders like the Marquis de Ruvigny, later Earl of Galway. William’s army had better artillery and ample supplies, which were brought by sea to his forward bases.
James commanded roughly twenty-three to twenty-five thousand troops, a number that varied with detachments and garrisons. His cavalry arm, including Irish horse and dragoons, was widely regarded as the superior of the two armies. Much of his infantry had been raised during 1689 and was unevenly trained and equipped. French support was present but limited, since Louis XIV’s main effort lay on the Continent. Senior Jacobite officers included Richard Talbot, Earl of Tyrconnell, James FitzJames, Duke of Berwick, and Richard Hamilton. Patrick Sarsfield, an able cavalry leader, had a role on the day but would become more prominent in the later defence of Limerick.
James chose a defensive line along the Boyne. The river is tidal in its lower reaches and can be crossed only at certain fords. The most important ford for the battle lay near the villages around Oldbridge. Upstream at Slane, there was another crossing that could be turned into an attack route. Downstream toward Drogheda, the river broadened, and crossings became more difficult under enemy fire. James arrayed his army to guard Oldbridge and watch for turns on the flanks. He planned to prevent a crossing, bleed William, and then fall back toward a prepared line near Duleek if threatened with encirclement.
William reached the Boyne at the end of June. During a reconnaissance on 30 June, a Jacobite cannonball grazed his shoulder and tore his coat. Rumours of his death spread, only to be dispelled when he appeared on horseback the next morning. William resolved to force a crossing while also sending a strong detachment upstream to Slane to turn the Jacobite left. The plan depended on pinning actions at Oldbridge and speed at Slane. If executed cleanly, it would compel James to abandon the line or risk being cut off.
Terrain and Weather
The Boyne flows east to the sea past Drogheda. Near Oldbridge, the river runs between gentle slopes divided by hedgerows and small fields. In 1690, the fords were shallow enough for infantry and cavalry to wade across, albeit under accurate musket and cannon fire. The Jacobite army occupied the southern bank with villages and hedges providing cover. On the northern bank, William’s army deployed along higher ground that gave his gunners clean fields of fire. Early July weather was fair and dry, which allowed movement and made the fords practicable for large bodies of troops.
Opening Moves
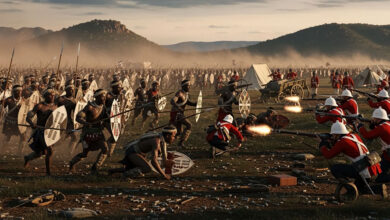
At dawn on 11 July, William put his plan in motion. He sent a sizeable column upstream under Count Meinhard von Schomberg and Count Solms toward Slane, with orders to cross and wheel against the Jacobite left. To fix the Jacobite centre, he pushed Dutch, English, and Huguenot units forward opposite Oldbridge with artillery support. Skirmishing quickly escalated into hard fighting in and around the village. Jacobite musketeers and pikemen resisted at hedges and gardens while cavalry threatened any formations that bunched at the river edge.
The fighting at Oldbridge was intense. Frederick, Duke of Schomberg, a veteran commander in William’s service and father of Meinhard, personally rallied Huguenot regiments near the ford when they faltered under counterattack. In doing so, he was killed in the confusion, a severe loss to William’s staff and a blow to morale among the Huguenot brigade. Despite local setbacks, the Williamite attacks kept pressure on the Jacobite centre and consumed reserves that James might otherwise have sent to his threatened left.
The Turning Movement at Slane
Upstream, the Williamite detachment reached Slane and found the crossing defended but not in great strength. After a fight on the riverbank, they secured the ford and began to cross in force. Once over, they faced fields and lanes that allowed them to deploy and start a southward swing toward the Jacobite left flank. Word of the crossing forced James to confront an uncomfortable choice. If he held fast at Oldbridge, his army risked being rolled up from the flank and rear. If he withdrew, he conceded the field but preserved his army for another day. He chose the latter. Orders were issued to form a rearguard and retire toward Duleek, where the River Nanny offered a new defensive line, covering the road to Dublin.
Climax near Oldbridge
As the Jacobite withdrawal began, the fighting at Oldbridge remained savage. William himself crossed the river with cavalry and encouraged his men to exploit the enemy movement. For a time, the battle devolved into a series of cavalry clashes and infantry firefights as the Jacobite centre tried to disengage in good order. Richard Hamilton led countercharges that bought precious time. The Duke of Berwick helped steady formations that were in danger of crumbling. The Jacobite cavalry proved its worth in these moments. It screened the movement of the infantry and struck opportunistically to blunt pursuit.
The Death of Schomberg and William’s Control
The loss of the Duke of Schomberg had a practical effect beyond the sorrow it caused. William had to take a more direct hand in managing the crossings and the pursuit that followed. His staff work held, and the coalition troops continued to coordinate despite language and drill differences. Dutch Blue Guards maintained discipline under fire. Danish battalions covered advances with steady volleys. Huguenots, despite their earlier setback, returned to the fight. English and Scottish regiments pressed through the ford and spread out on the southern bank.
The Jacobite Retreat to Duleek
By early afternoon, the Jacobite army had largely disengaged from Oldbridge and was falling back toward Duleek. The country between the Boyne and the Nanny is cut by small streams and lanes that hamper rapid pursuit. Nevertheless, the Williamite cavalry tried to press the retreat. The Jacobite rearguard fought a series of delaying actions, preventing the pursuit from turning into a rout. The army crossed the Nanny at Duleek and continued toward the line of the River Liffey and Dublin.
Casualties and Costs
Casualty estimates vary, as they often do for seventeenth-century battles. William’s army likely suffered several hundred killed and more wounded, among them senior officers such as the Duke of Schomberg. Jacobite losses were heavier but not catastrophic, probably around one to one and a half thousand men, including a disproportionate number from units that absorbed the most brutal fighting at Oldbridge. The river itself took its toll on men who attempted to swim in armour or were swept off their feet in the crush at the fords.
A Tactical and Strategic Result
The Battle of the Boyne was a clear tactical success for William. He forced a major river line, turned his opponent’s flank, and drove the Jacobite army from the field. It was not a destroying victory in the sense of trapping and annihilating the enemy. James’s army survived to fight again and withdrew in reasonable order. Strategically, however, the effect was decisive. The road to Dublin lay open. James rode to the capital, conferred briefly with his council, and then departed for the west coast, where he took ship for France. His departure demoralised many supporters and weakened the political credibility of the Jacobite cause in Ireland.
William entered Dublin and set about reducing the remaining strongholds. The war did not end with Boyne. The Williamite attempt to take Limerick in 1690 failed after Sarsfield’s famous raid destroyed the Williamite siege train near Ballyneety and after stout defence on the walls. The following campaigning season brought a Jacobite field army to battle at Aughrim in 1691, where the Jacobite commander, the Marquis de St Ruth, was killed and the army shattered. That defeat opened the way to a second siege of Limerick and the Treaty of Limerick later in 1691. The treaty’s civil articles promised protections to Catholics and property holders, although enforcement soon narrowed and later penal legislation imposed harsh restrictions. Boyne, therefore, belongs to a chain of events rather than an isolated triumph.
European Context
The Boyne also mattered in Europe. Louis XIV had hoped that a restored James II in London, or even a prolonged war in Ireland, would divert English and Dutch resources away from the continental front. William’s success at the Boyne and subsequent consolidation denied France that advantage. English and Dutch ships continued to contest French power at sea. Allied armies engaged France on the Rhine and in the Low Countries. The Boyne assured William of the political base needed to maintain the coalition against Louis and strengthened his standing among allies who doubted the durability of the new English regime.
Memory, Symbols, and Commemoration
The afterlife of the battle is as significant as the event itself. For Williamite supporters in Ireland, especially in Ulster, the Boyne represented deliverance from the threat of confiscation and the prospect of a Catholic monarchy. Parades and bonfires, later formalised by the Orange Order, fixed 12 July as a date of celebration. William is remembered as King Billy, sometimes depicted on a white horse, a powerful image drawn from contemporary prints and later popular art. On the Jacobite side, the battle entered memory as a brave but ultimately unsuccessful stand that became part of a longer story culminating in defeat at Aughrim and exile known as the Flight of the Wild Geese.
Interpreting the Boyne requires care. Religion was a central marker in the conflict, yet the armies themselves were coalitions, and the politics were European as well as Irish. A significant portion of William’s infantry was not English and included French Protestants. Many Irish Catholics fought because the Jacobite cause promised the restoration of lands and legal status as much as for confessional solidarity. The battle is therefore best understood as a dynastic contest with powerful religious and social dimensions that echoed for generations.
Leadership and Lessons
William’s plan at the Boyne shows a preference for combined arms and manoeuvre over frontal attrition. The demonstration at Oldbridge fixed the Jacobite centre, while the real decision came from the turning movement at Slane. James’s decision to withdraw rather than risk entrapment was sound given the circumstances, although his departure from Ireland soon after carried a heavy political cost. The battle highlights the importance of rivers and road networks in seventeenth-century warfare. It also demonstrates how the quality of cavalry and the steadiness of infantry in village fighting can determine whether a retreat becomes a disaster or a controlled movement.
The Site Today
The battlefield has been partially preserved and interpreted for visitors. The gentle terrain can be misleading, as the drama lies in the fords, hedgerows, and villages rather than in grand ridges. The Oldbridge Estate now houses a visitor centre. Commemoration has gradually widened beyond partisan narratives toward a shared historical understanding. The site receives visitors from across traditions who wish to grasp the military event and the layered memories it created.
Final Word The Battle of the Boyne did not end the Williamite War in Ireland, but it decided the direction of travel. William forced a river line, unhinged the Jacobite defence, entered Dublin, and secured the political foundation of his rule. James’s army survived but lost the initiative and much of its confidence. Within a year, the war would be over, and the settlement that followed would shape Irish society for generations. The Boyne stands at the point where European grand strategy, dynastic rivalry, and Irish land and religion intersected. Understanding the battle means following the action at the fords and fields, then tracing its consequences from Dublin to Limerick and from the Irish Parliament of 1689 to the Penal Laws that followed. The river that William’s army waded on that July morning became a line in memory as well as on the map, a reminder of how a single day’s manoeuvre can pivot the fate of kingdoms.
The Battle of the Boyne FAQ
A major battle of the Williamite War in Ireland, fought on 11 July 1690, near the River Boyne by Drogheda, between William III’s Williamite army and James II’s Jacobite forces.
William’s successful crossing and flanking move opened the road to Dublin, weakened the Jacobite cause, and secured William’s position in Britain and Ireland within the larger European war against Louis XIV.
William’s coalition included Dutch, English, Scottish, Danish, and French Huguenot regiments. James’s army comprised Irish infantry and cavalry with some French support. Senior leaders included William III, the Duke of Schomberg, James II, Tyrconnell, and the Duke of Berwick.
No. The conflict continued through 1691, including the battles of Aughrim and the sieges of Limerick, ending with the Treaty of Limerick later that year.


